Problem
How to start two or more Liferay servers simultaneously with different ports?
Sometimes, we need to start multiple Liferay servers on the same system to locally debug problems with clustering or remote staging features.
Solution
We can modify the Liferay Tomcat server configuration and change the Elasticsearch properties for two separate Liferay instances (e.g., Liferay DXP or Liferay CE 7.x) on the same system.
Prerequisites
- Java JDK 8+ installed.
- Two separate Liferay bundles (unzipped in different folders).
- Separate databases for each Liferay instance (e.g., liferay_db1, liferay_db2 in MySQL/PostgreSQL).
- Sufficient system RAM (4 GB+ recommended for each instance).
- Basic knowledge of Liferay Server setup.
Step-by-Step Setup
Step 1. Prepare Two Separate Liferay Bundles
Unzip the Liferay bundle twice using the same version or using two different versions, placing them in different folders:
e.g., ~/liferay-portal-tomcat-7.4.3.125-ga125-1726242956/
e.g., ~/liferay-portal-tomcat-7.4.3.132-ga132-1739912568/
Step 2. Configure Different Ports for Any One Server
Note: We don’t need to change the port for both the Liferay instances. We can start one Liferay instance on the default 8080 port and the second one on a different port(9080).
Edit the server.xml files for the “liferay-portal-tomcat-7.4.3.132-ga132-1739912568” server instance.
Server.xml file is located on the “/<liferay_bundle>/liferay-portal/tomcat/” path.
Change Port
<Server port="8005" shutdown="SHUTDOWN">
...
<Connector maxThreads="75" port="8080" protocol="HTTP/1.1"
               connectionTimeout="20000"
               redirectPort="8443"
               maxParameterCount="1000"
               />
To something like:
<Server port="9005" shutdown="SHUTDOWN">
...
<Connector maxThreads="75" port="9080" protocol="HTTP/1.1"
               connectionTimeout="20000"
               redirectPort="9443"
               maxParameterCount="1000"
               />
Step 3. Database Connection
Configure DB connection properties in the portal-ext.properties.
...
jdbc.default.driverClassName=org.postgresql.Driver
jdbc.default.username=postgresjdbc.default.password=postgres
jdbc.default.url=jdbc:postgresql://localhost:5432/lportal
...
Step 4. Start the server for the first Liferay Instance
Start liferay-portal-tomcat-7.4.3.132-ga132-1739912568 > tomcat-9.0.65 > bin > startup (for Windows: batch file, and for Linux: shell script file).
#JPDA start
sh bin/catalina.sh jpda start
#Normal Start
sh bin/catalina.sh start
Step 5. Change the Elasticsearch 7 embedded HTTP port
After the successful startup of Liferay, sign in to the site as an Admin.
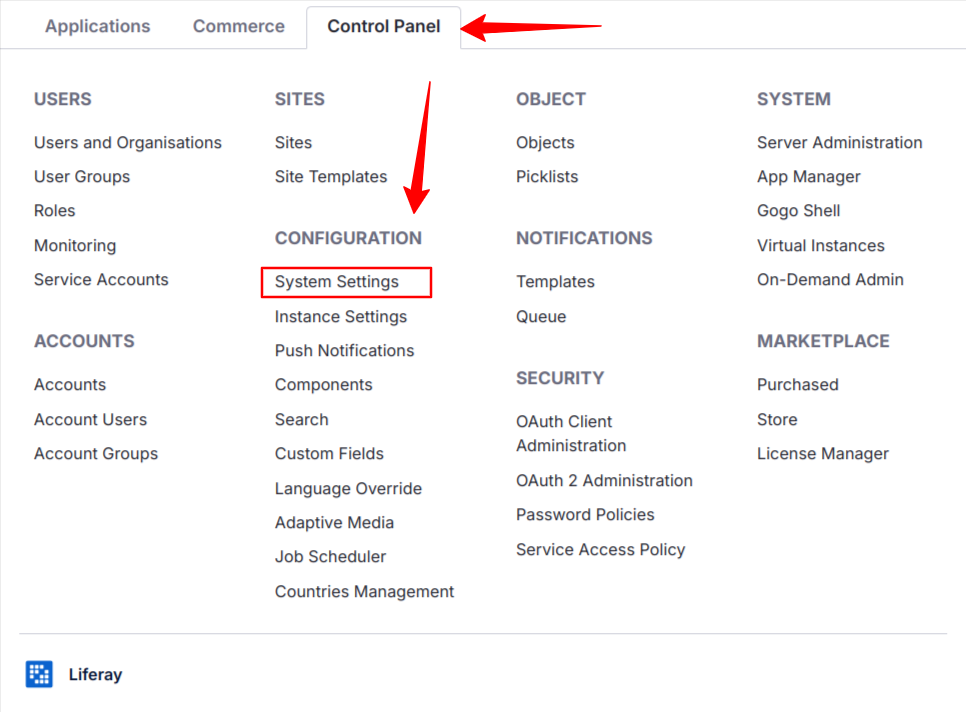
- To access the system settings, go to the Control Panel, then go to the Configuration section, and click on System Settings.
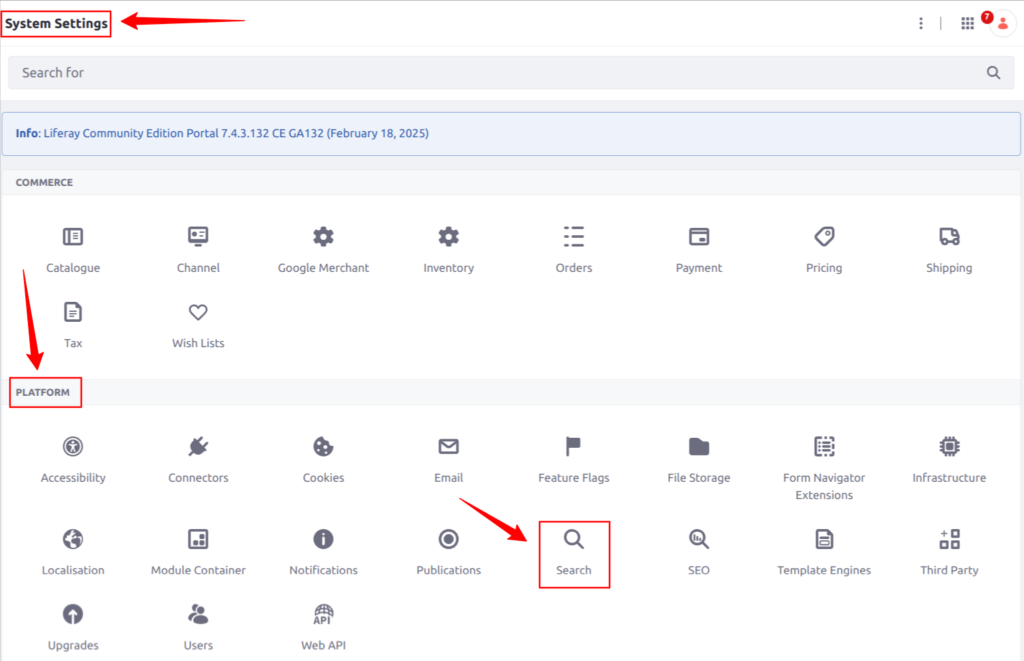
- To access the search feature, click on “Search” found in the following path: System Settings > Platform > Search.
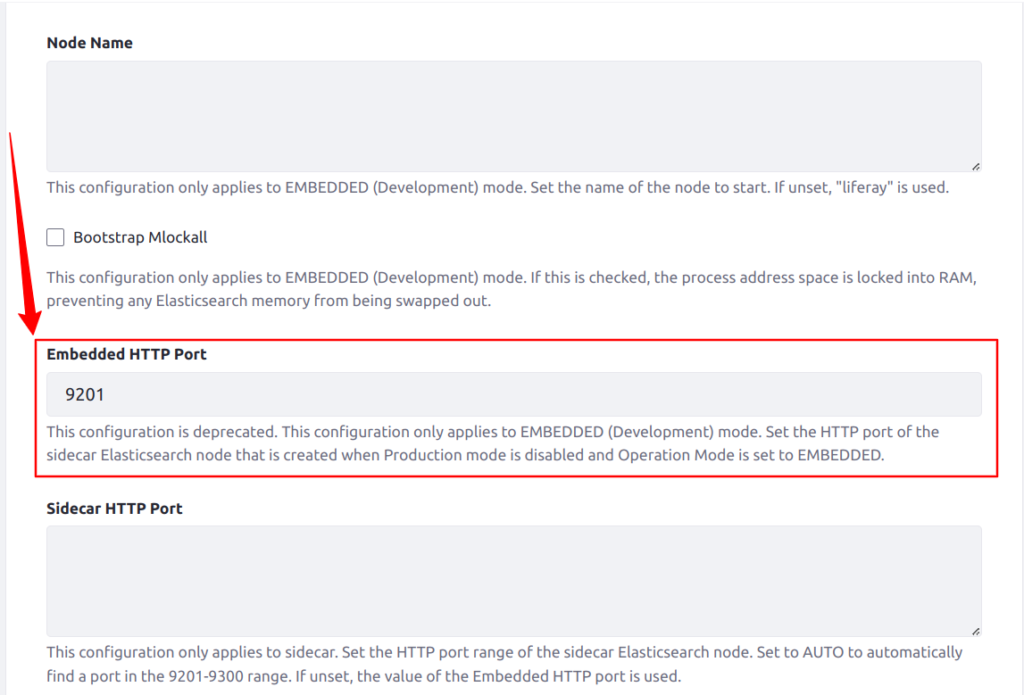
- Click on “Search,” open a new tab, and select “Elasticsearch 7″ to access the Elasticsearch 7 configuration page, as shown in the image below.
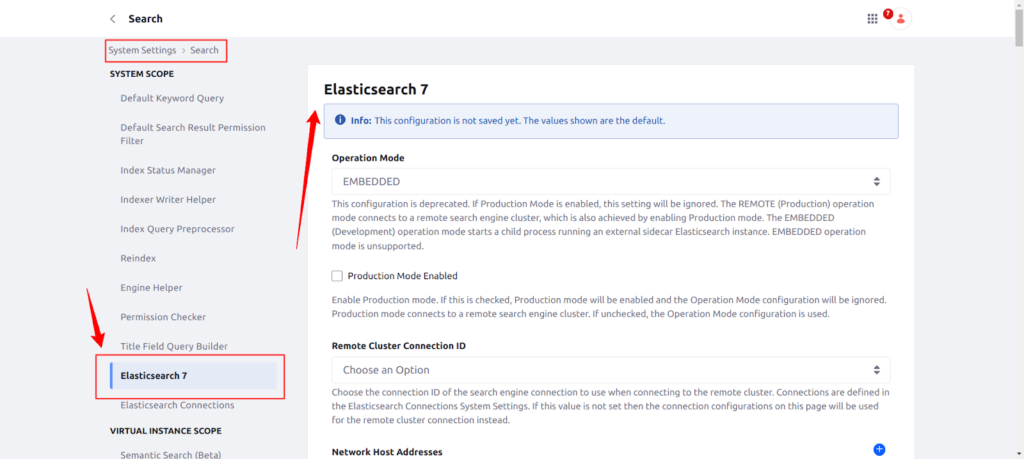
- Scroll down the page until you find the “Embedded HTTP Port,” and change the default port from “9301” to “9302.”
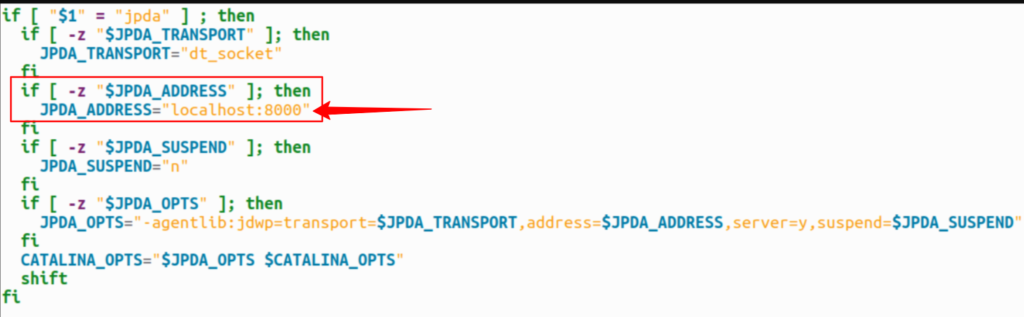
Step 6. (Optional) Change JPDA start port
If you start the Tomcat server with the JPDA start, you need to change the port “8000” to “8001” in the file named “Catalina.sh” for Linux and “Catalina.bat” for Windows.
Step 7. Restart the Liferay server
Restart the Liferay server using the following command in the Linux system:
#Stop the server
sh bin/catalina.sh stop
#JPDA start
sh bin/catalina.sh jpda start
#Normal Start
sh bin/catalina.sh start
Now, you can see Elasticsearch start with the port “9301” in the logs, as shown in the image below.

Step 8. Start the second Liferay server
Now, you can start the second Liferay Instance on the same system on the default port “8080”.
#JPDA start
sh bin/catalina.sh jpda start
#Normal Start
sh bin/catalina.sh startConclusion
In this blog, you have learned about running multiple Liferay servers on the same machine. It is not only possible but also quite straightforward with a few careful configurations. By setting different ports and databases for each instance, you can avoid conflicts and ensure each server runs independently. This setup is ideal for development, testing, or even multi-tenant demonstrations on a single system. With the flexibility Liferay offers, managing multiple environments becomes smooth and efficient.
I hope this guide helps you get your servers up and running! Happy building with Liferay 🚀